Pineapple Buns
Pineapple buns are classic pastries that you can find in Hong Kong style bakeries. The bun is soft and slightly sweet and it’s topped with a golden crunchy, crumbly crust. This pineapple bun recipe uses ingredients that you can find in any grocery store.
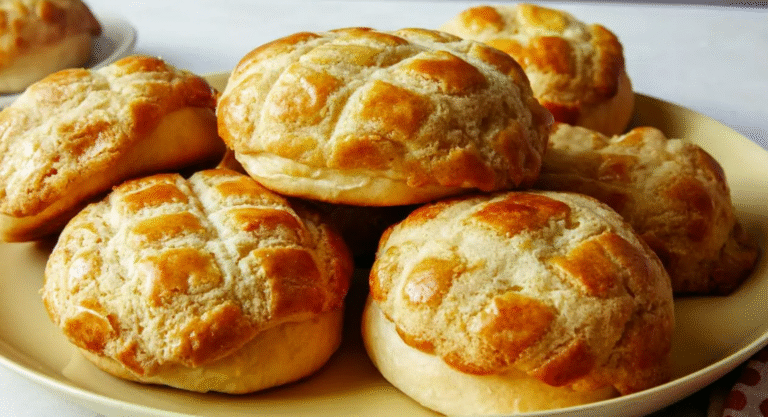
All the Chinese bakeries near me when I was growing up used pink boxes to package their pillowy goodies, and the sight of that box always brings a feeling of nostalgia. Our usual order was a combination of cocktail buns, pork buns, egg tarts, and of course pineapple buns. The crosshatch-patterned pineapple buns had a bright yellow hue and were the messiest to eat, leaving a trail of crisp crumbs as the sweet topping inevitably fell apart as you bit into the plain soft bun. I knew of no one who actually made any of these buns and pastries at home, as they were cheap and easy to just purchase, but I’m glad to see that home bakers are now trying to replicate them. This pineapple bun recipe was developed based on tips and recipes I found from other Chinese women I admire and respect, and I’m so thankful for their collective wisdom.
Why Are Pineapple Buns Called Pineapple Buns?
The name is a bit misleading for those not familiar with pineapple buns. There’s no pineapple juice or fruit in the bun; rather, the pineapple references both the yellow hue and the crosshatch pattern of the topping. Many bakeries nowadays skip the crosshatch pattern, so the buns just have a crackly top.
Who Invented the Pineapple Bun?
The pineapple bun was invented in the 1940s in Hong Kong. The original pineapple bun contains no filling, but modern versions can be filled with a cold pat of salted butter, char siu pork, custard, or even red bean paste.
How to Make Pineapple Buns
These buns are a project for sure, taking 3 1/2 to 4 1/2 hours from start to finish, but here are a few tips I’ve gleaned along the way to make the process as foolproof as possible.
- Make a tangzhong: Tangzhong is a technique where some of the flour and liquid is cooked together until thick and gel-like. It makes doughs softer and fluffier, and keeps them from drying out as quickly. I borrowed a trick from my mom’s pineapple bun recipe to make a larger tangzhong here.
- Make the dough: Make a standard milk bread dough with the tangzhong and bread flour and set it aside to rise while you make the topping.
- Make the topping: The topping is the crowning glory of a pineapple bun, and I learned from Kristina Cho’s lovely Mooncakes and Milk Bread cookbook to use baking soda to help it crackle, and to add some food coloring if you want that signature yellow hue.
- Form the rolls: Once the dough is risen, shape into individual buns like you would dinner rolls.
- Roll out and chill the topping: While the rolls do their second rise, roll out the topping into individual rounds between a cut-up plastic sandwich bag (a fabulous tip from Lisa Lin), which is thicker than plastic wrap. Cut out the crosshatch pattern (which you can skip if you want) and chill until ready to use.
- Top and bake: When the rolls are puffy and soft, lay the topping on top, brush with egg wash to make the buns are shiny and to add a touch more color, and bake.